Deploy and manage Azure resources using IaC with Azure DevOps. Learn to run pipelines, use Bicep templates, and manage updates via pull requests.

This project demonstrates deploying and managing Azure resources using IaC with Azure DevOps. You will work with YAML pipelines and Bicep templates to automate provisioning of resource groups, VNets, and VMs.
Key steps include:
- Understanding project files, setting up a self-hosted agent, configuring service connections, running deployment pipelines, and managing changes through pull requests.
- This hands-on project highlights automated deployments, secure configurations, and professional DevOps workflows.
The project consists of three files:
- iac-demo-pipeline.yaml — the Azure DevOps pipeline
- iac-demo-rg.bicep — subscription-level Bicep template for Resource Group creation
- iac-demo-vm.bicep — resource-group-level Bicep template for deploying the Virtual Network and Virtual Machine
The YAML pipeline automatically uses these two Bicep files to create the Resource Group first, extract its output values, and then deploy the VNet and VM into that Resource Group. This allows a fully automated, repeatable, and parameter-driven deployment.
*
Task Details
1. Understand project files: iac-demo-pipeline.yaml, iac-demo-rg.bicep, iac-demo-vm.bicep.
2. Set up a self-hosted agent in Azure DevOps to run your deployments.
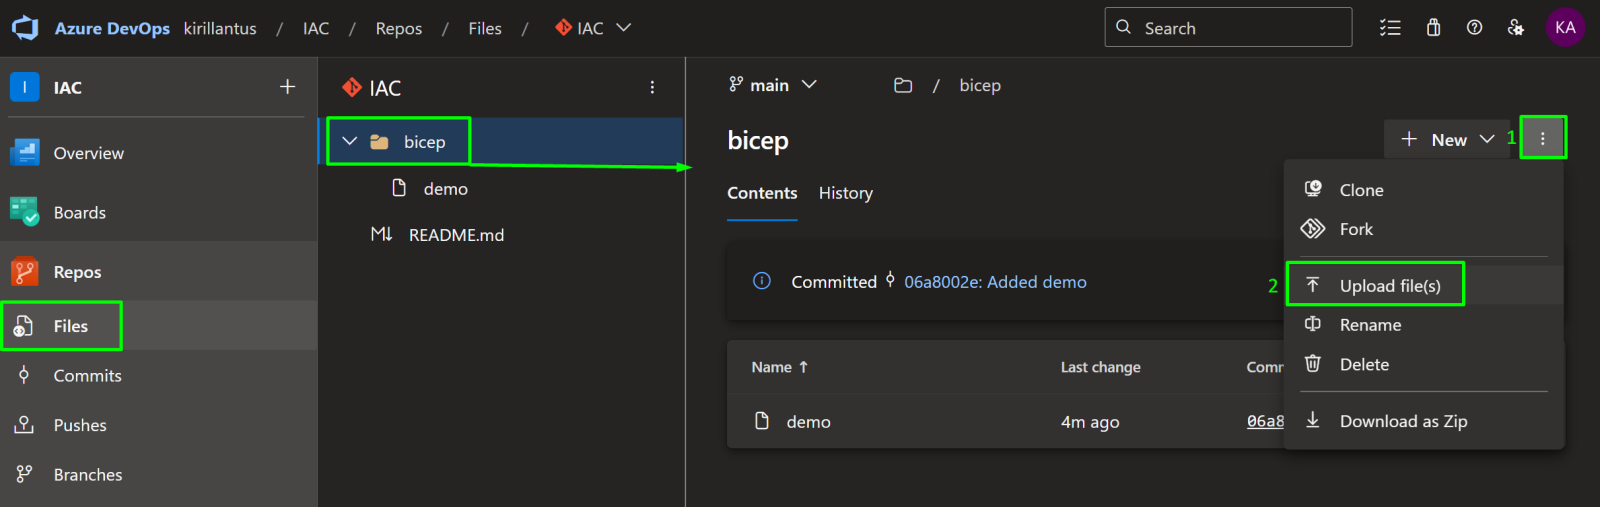
3. Upload the files and run the YAML pipeline to deploy resources.
4. Create service connection.
4. Create and run a pipeline in Azure DevOps to deploy resources by using the YAML along with the two Bicep templates.
5. Make changes to your deployment through the IaC DevOps portal and create a pull request.
*
Steps
Understand project files.
1. Pipeline File—iac-demo-pipeline.yaml
This YAML file defines the Azure DevOps pipeline that automates your entire infrastructure deployment. It does two things:
Deploys the Resource Group using a subscription-level Bicep file (iac-demo-rg.bicep).
The pipeline captures the outputs (resource group name, location, tags) and stores them as variables.
Deploys the VNet and VM into that resource group using the second Bicep file (iac-demo-vm.bicep).
The pipeline uses the variables from the first deployment to ensure everything is consistent and fully automated.
This file connects DevOps → Azure → your Bicep templates and acts as the “controller” for the whole deployment.
Copy iac-demo-pipeline.yaml content
Note: Scroll down to locate the iac-demo-vm.bicep file string.

*
2. Resource Group Bicep File—iac-demo-rg.bicep
This Bicep template runs at the subscription scope and is responsible for creating the resource group that will hold all other resources. It defines:
Parameters for the resource group name (rg-iac-01), location, and tags
A Resource Group resource using Microsoft.Resources/resourceGroups
Outputs (name, location, tags) that the pipeline will capture and pass to the next deployment
These outputs are essential because the VM and VNet deployment uses them to ensure all resources are created in the correct resource group with consistent tags.
Copy iac-demo-rg.bicep content

*
3. VM + VNet Bicep File — iac-demo-vm.bicep
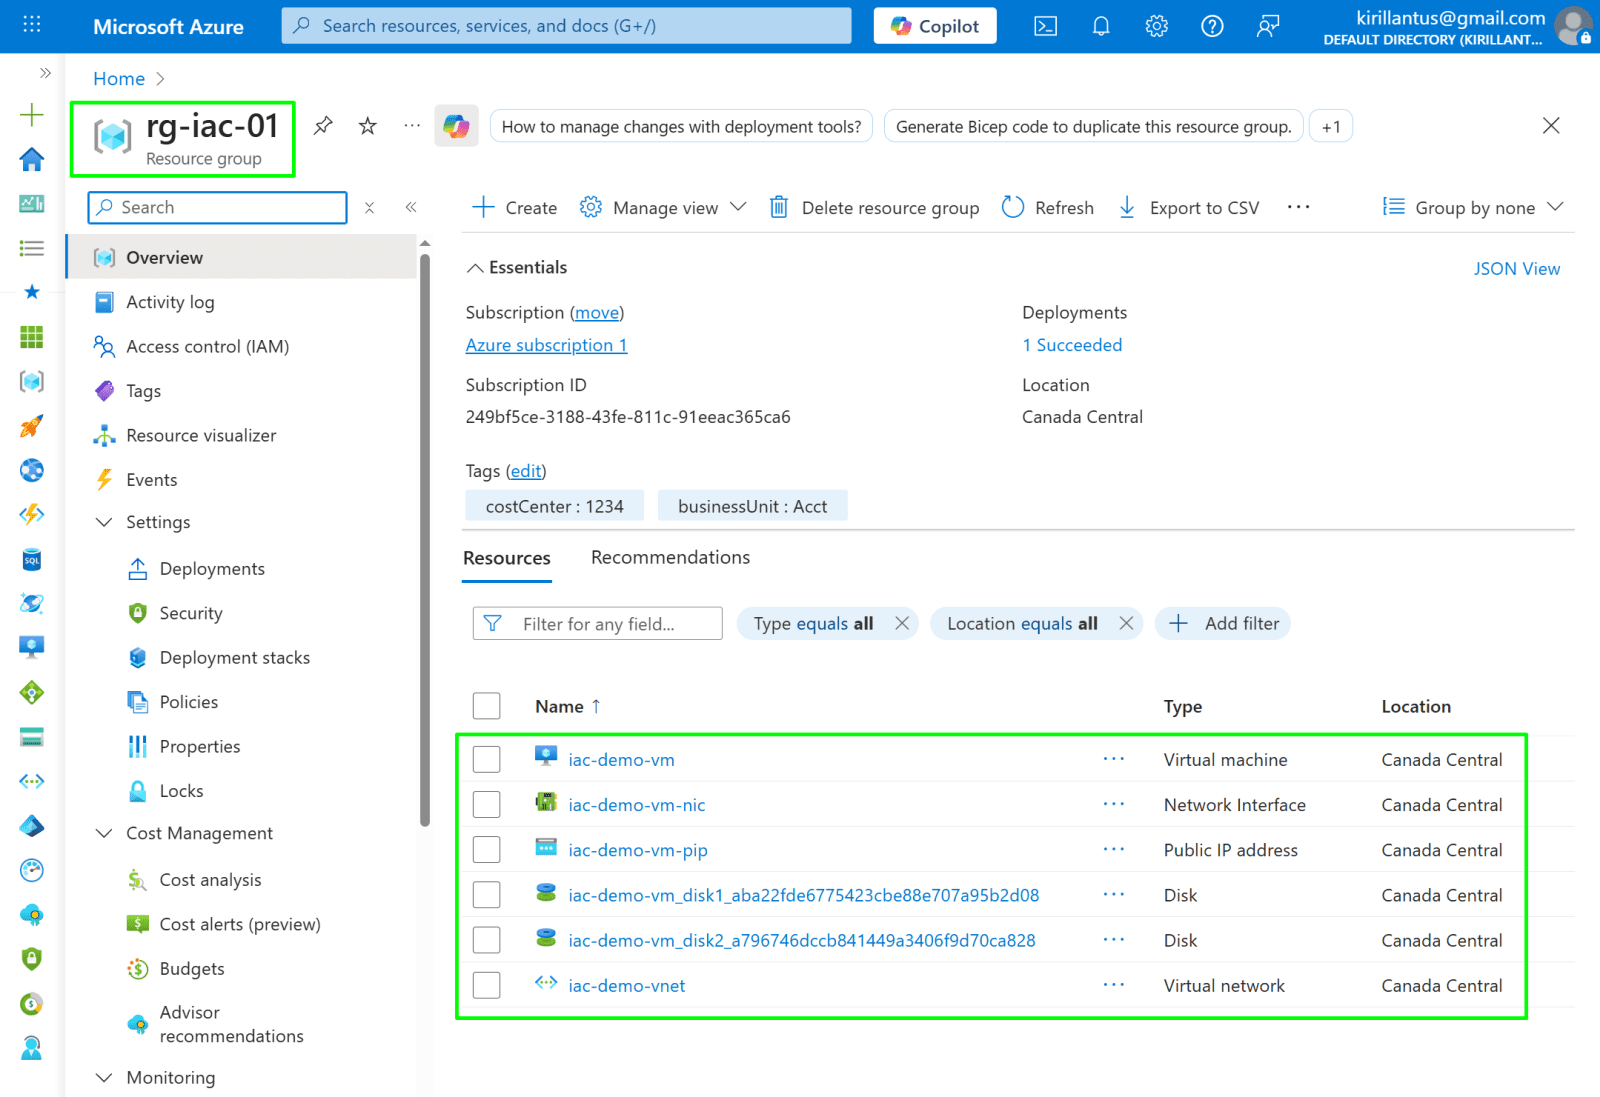
This Bicep template deploys all required compute and networking resources inside the resource group created earlier. It takes parameters (location, VM name, tags, sizes, VNet settings) passed from the pipeline and builds:
- A Virtual Network (VNet) with an address space and one subnet
- A Public IP address for external connectivity
- A Network Interface (NIC) that links the VM to the VNet
A Virtual Machine (VM) running Ubuntu, with:
- OS disk
- A 1 TB data disk
- Admin credentials
- VM size and storage type
This file contains the core infrastructure logic, defining how the VM and networking components are created and connected. The pipeline uses this template after the resource group is created to complete the full environment deployment.
Copy iac-demo-vm.bicep content

*
Set up a self-hosted agent in Azure DevOps to run your deployments.
1. Navigate to Your Project in Azure DevOps https://dev.azure.com/
- Open Azure DevOps in your browser.
- Select your organization from the list.
- Click on the project you want to work on to open its dashboard.

*
2. Open Project Settings.
- In your Azure DevOps project, scroll to the bottom-left corner of the page.
- Click on Project Settings to access configuration options for your project.

*
3. Choose Your Agent Pool.
To use your own machine, select the Default (Self-Hosted) Agent.
If you want to use Microsoft-managed infrastructure, select Azure Pipelines, which provides a Microsoft-hosted agent.

*
4. Add a Self-Hosted Agent Pool.
- Click “Add pool” to create a new agent pool.
- Under Pool type, select Self-hosted.
- Provide a name for your agent pool.
- Check “Grant access permissions to all pipelines” to allow all pipelines in the project to use this pool.
Note: An agent pool provides the machines (agents) that Azure DevOps pipelines use to run builds, tests, and deployments. Without a pool, your pipelines cannot execute.

*
5. Click on the self-hosted agent pool you just created to view its details and manage agents.

*
6. Add a New Agent.
- Click “New agent” within your self-hosted agent pool.
- Download the agent package for your operating system (e.g., Windows, Linux, macOS).

*
7. Initialize the Agent Connection.
Unzip the downloaded agent with: tar zxvf filename.gz

*
8. Open a terminal on your Linux system.
Run the configuration script: ./config.sh
When prompted, provide:
- Server URL – the URL of your Azure DevOps organization.
- Personal Access Token (PAT) – generated earlier. (Refer to this guide on how to generate a PAT token.)
- Agent pool – select the pool you created.
Accept the default settings for the remaining prompts, unless you have custom requirements.

*
9. Start the Self-Hosted Agent.
In the agent folder, run the following command to start the agent and listen for pipeline requests: ./run.sh
The agent will now connect to Azure DevOps and be ready to execute jobs from your pipelines.

*
Note: To install Azure CLI on Kali Linux use these steps:

*

*
10. Confirm that the agent is online in DevOps portal.

*
Now it's ready to run pipelines.
With your self-hosted agent running and connected, you are now ready to execute Azure DevOps pipelines.
Pipelines will use your self-hosted agent to perform builds, tests, and deployments.