Azure File Sync is used to implement hybrid file storage by syncing on-premises file servers with Azure file shares.

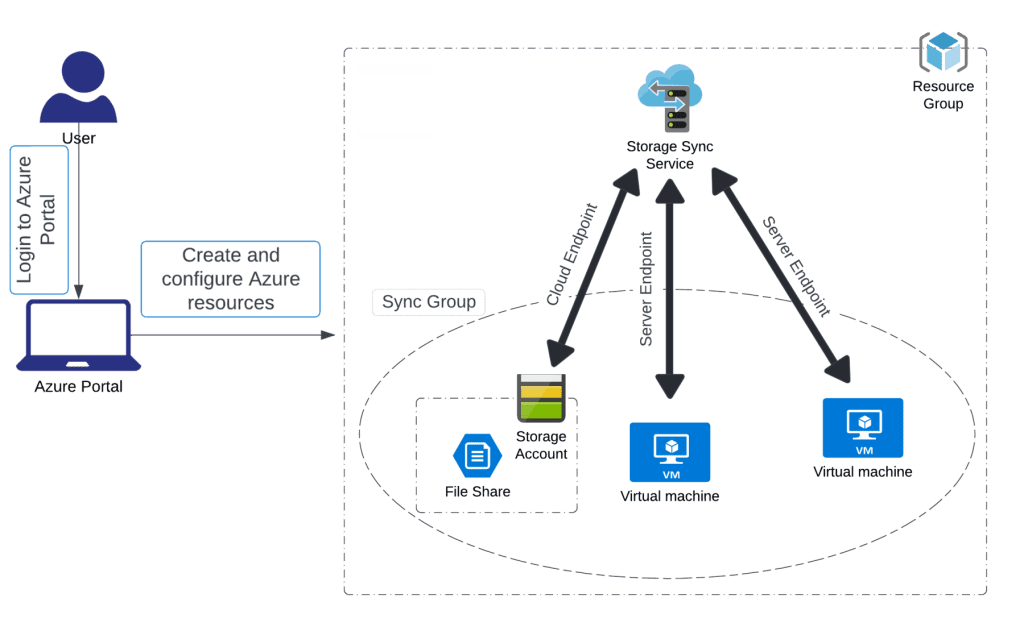
Architecture diagram
Task Details
1. Create a Storage Account
Provision an Azure Storage Account to host your file share. This will serve as the cloud backend for file synchronization.
2. Create an SMB File Share
Within the storage account, create an SMB-compatible file share. This share will be used to sync data between your on-premises servers and Azure.
3. Deploy Two Windows Servers
Deploy two Windows Server virtual machines in Azure. These will act as the endpoints for syncing and testing Azure File Sync.
4. Prepare Windows Servers for Azure File Sync
Connect to the VMs, configure networking, and create local folders that will participate in file sync.
5. Deploy the Storage Sync Service
Set up the Azure File Sync Service in the same region as your storage account. This service manages synchronization between your servers and the Azure file share.
6. Install the Azure File Sync Agent
Download and install the Azure File Sync agent on both Windows Server VMs to enable communication with the Storage Sync Service.
7. Register Windows Servers with the Storage Sync Service
After installation, register each Windows Server with the Storage Sync Service using the built-in registration wizard.
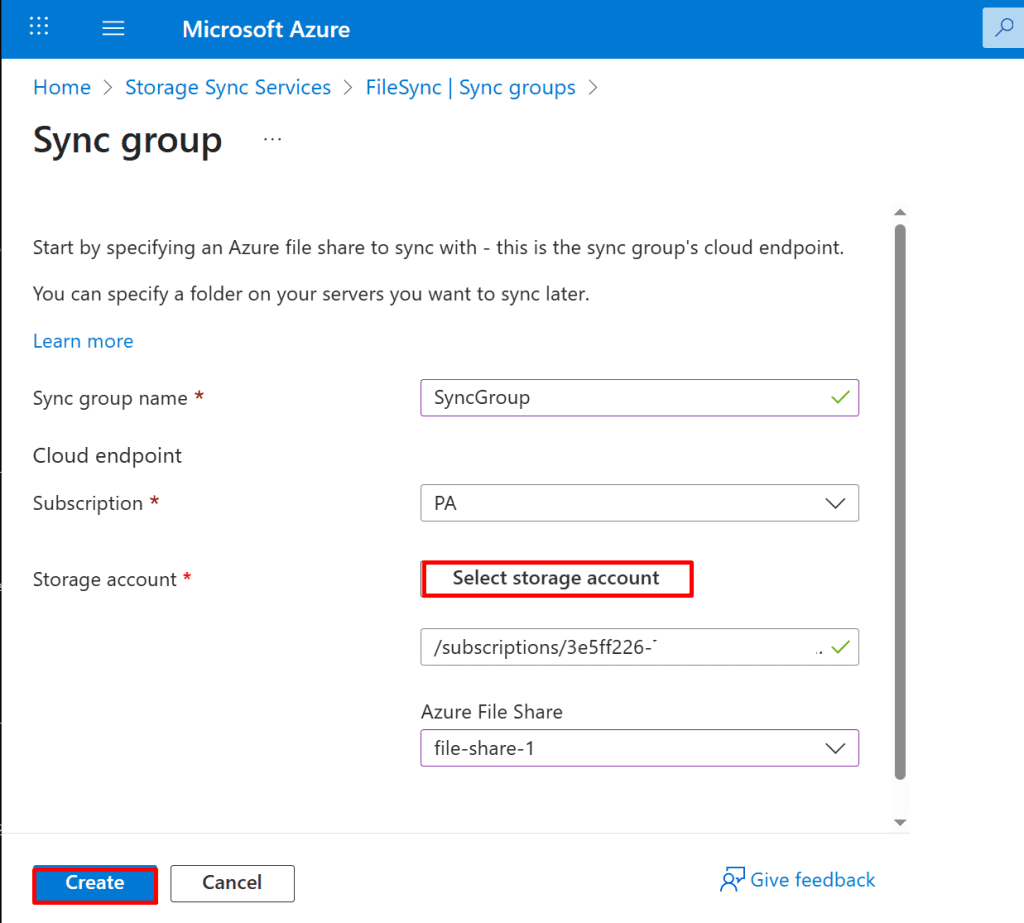
8. Create a Sync Group and a Cloud Endpoint
In the Storage Sync Service, create a Sync Group and link it to the SMB file share. This forms the cloud endpoint of your synchronization topology.
9. Create a Server Endpoint in the Sync Group
Add the registered server (VM1) to the Sync Group and map it to the local folder (e.g., D:\SyncFolder). This enables bi-directional sync between VM1 and the Azure file share.
10. Test the Sync Group with One Server Endpoint
Create a test file in the local folder on VM1 and verify that it appears in the Azure file share, confirming successful synchronization.
11. Test the Sync Group with Two Server Endpoints
Add VM2 to the same Sync Group. Confirm that files created on one VM appear on the other, demonstrating full sync functionality across endpoints.
12. Perform a Validation Test
Test file creation and sync from both VMs, validate cloud tiering behavior if enabled, and confirm health status in the Azure portal.
*
Steps
1. Create a Storage Account
- In the Azure portal's search bar, type "storage".
- From the search results under "Services," click "Storage accounts."
- On the Storage accounts page, click the "+ Create" button.

*
2. Provide a unique name for the storage account and complete the remaining settings as follows.

*
3. Click on the Next: Advanced button and configure the following setting:
- Require secure transfer for REST API operations: Uncheck the box.
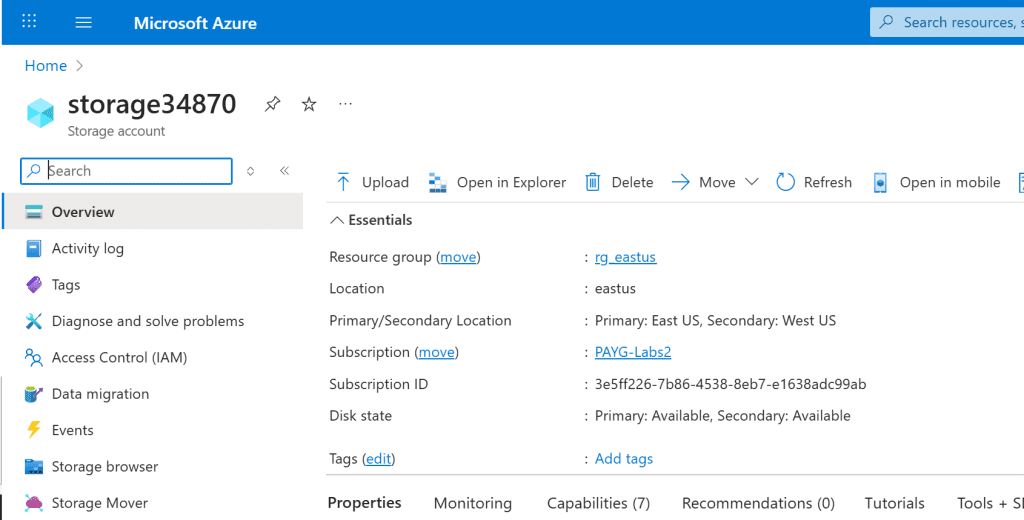
- Click on the Review + Create button at the bottom of the page, then click Create. After a few minutes, your storage account will be created.
- Click on the Go to resource button.

*
4. Create an SMB File Share
- Navigate to your Storage Account in the Azure portal.
- In the left-hand menu under Data storage, click on File shares.
- Click on the + File share button at the top.
Fill in the required details:
- Name: Provide a unique name for your file share.
- Quota (optional): Set the maximum size (in GiB) for the share, or leave it as default.
Click on the Create button.

*
5. Select the + File share option, enter the following details in the "New file share" window, then click on Review + create, and finally click Create.
Note: Tier: Select Hot


*
6. Deploy Two Windows Server Virtual Machines
- In the Azure portal, go to Virtual machines.
- Click on + Create and select Azure virtual machine.

*
7. On the Basics tab, enter or select the following details:
Resource group: Select your resource group
Instance details:
- Virtual Machine Name: Enter VM1
- Region: Select East US
- Availability options: Select No infrastructure redundancy required
- Security type: Select Standard
- Image: Select Windows Server 2022 Datacenter - Gen2
- Azure Spot Instance: Leave the default unchecked.
- Size: Select Standard_B2s
Administrator Account:
- Username: Enter vm1
- Password: Enter a password
- Confirm password: Re-enter password
Inbound Port rules:
- Public inbound ports: Select Allow selected ports
- Select inbound ports: Select HTTP (80), RDP (3389)

*
8. Select desired setting on disks tab, then Review + Create

*
9. Deploy a second virtual machine using the same steps as VM1 (refer to steps 6 to 8), and select the following details.
On the Basics tab, enter or select the following details:
Resource Group
Resource group: Select your existing resource group
Instance Details:
- Virtual machine name: VM2
- Region: East US
- Availability options: No infrastructure redundancy required
- Security type: Standard
- Image: Windows Server 2022 Datacenter - Gen2
- Azure Spot instance: Leave unchecked
- Size: Select Standard_B2s
Administrator Account:
- Username: vm2
- Password: Enter a secure password
- Confirm password: Re-enter the same password
Inbound Port Rules:
- Public inbound ports: Allow selected ports
- Select inbound ports: HTTP (80), RDP (3389)
*
10. Connect to Windows Server VM1 and Prepare It for Azure File Sync.
- In the Azure portal, navigate to Virtual Machines.
- Select VM1 from the list.
- Click Connect, then choose RDP.
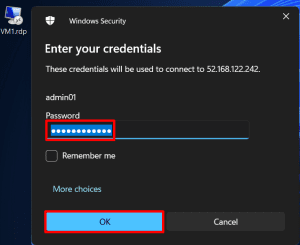
- Download the RDP file and open it.
- Log in using the administrator credentials you set for VM1.
Note: Make sure VM1 is updated and has the File Server role installed before setting up Azure File Sync.


*
11. Turn off Internet Explorer Enhanced Security Configuration to browse the web more conveniently.

*
12. Go back to Azure and deploy the Storage Sync Service in Azure and provide a name for the Storage Sync Service.

*
13. Provide a name for the Azure File Sync service, then click the Review + Create button and select Create.
Note: Choose a clear, descriptive name for the Storage Sync Service to easily identify it later.