A complete DevOps setup for configuring self-hosted agents, running YAML pipelines, managing secrets, and sending secure notifications via SendGrid.

This project walks you through the essential setup steps for Azure DevOps before building advanced CI/CD pipelines. You’ll create a new project, configure authentication, set up a self-hosted agent, initialize your repo, run your first YAML pipeline, connect GitHub, and manage secrets with Key Vault and group variables.
By the end, you’ll have a solid DevOps foundation that matches real industry environments.
*
Task Details
1. Create a new Agile project and generate a PAT if you plan to use a self-hosted agent.
2. Create an agent pool, add a self-hosted agent, download the agent, and complete the connection to Azure DevOps.
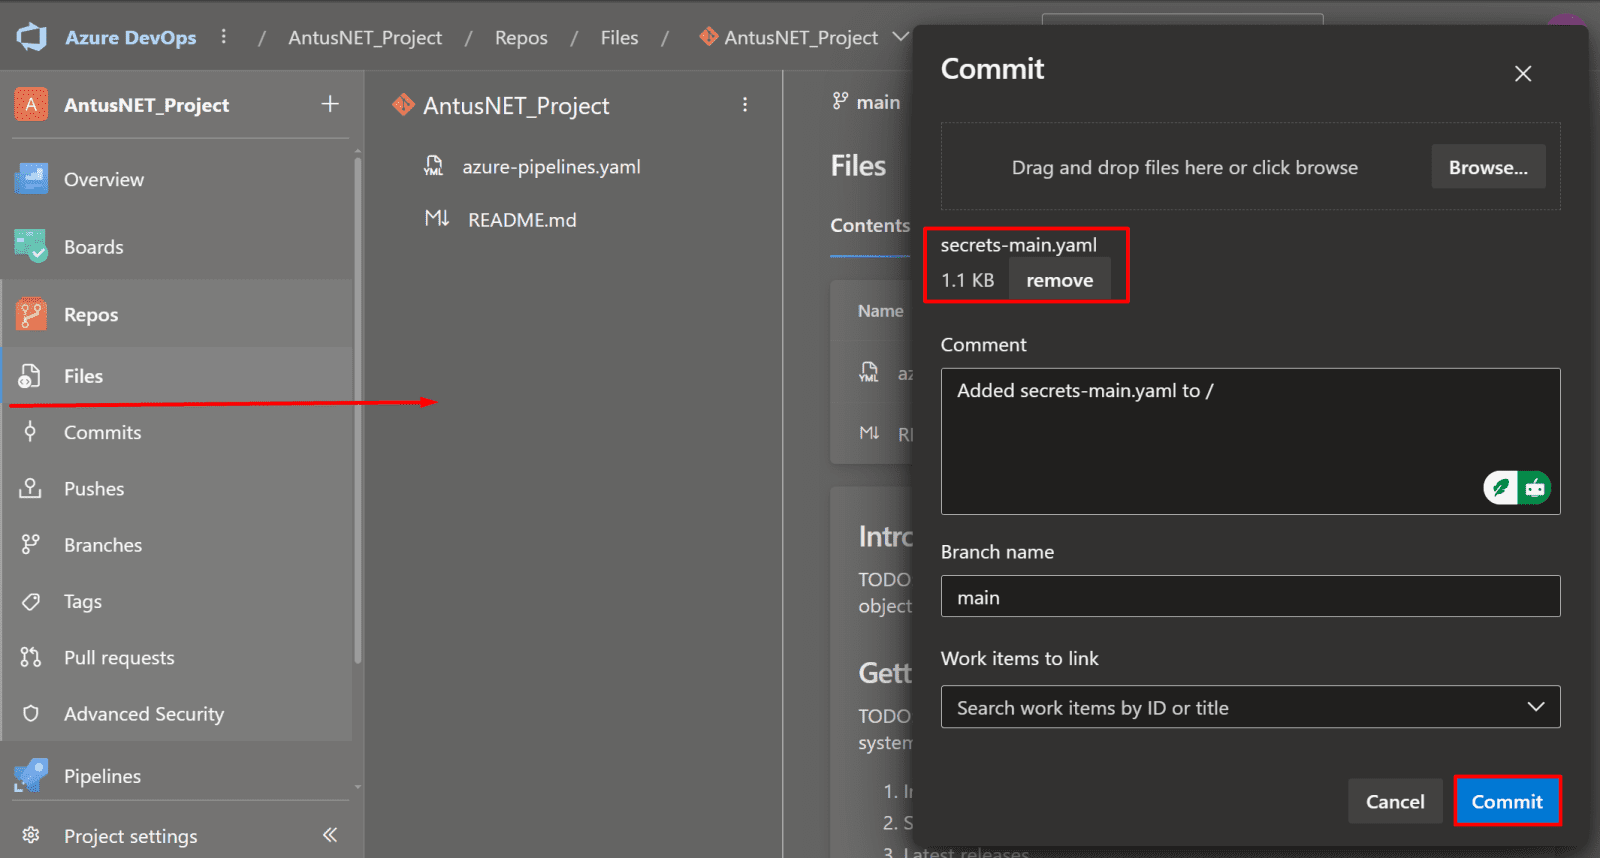
3. Initialize the main branch and upload a test YAML pipeline file.
4. Create a pipeline to run your YAML file.
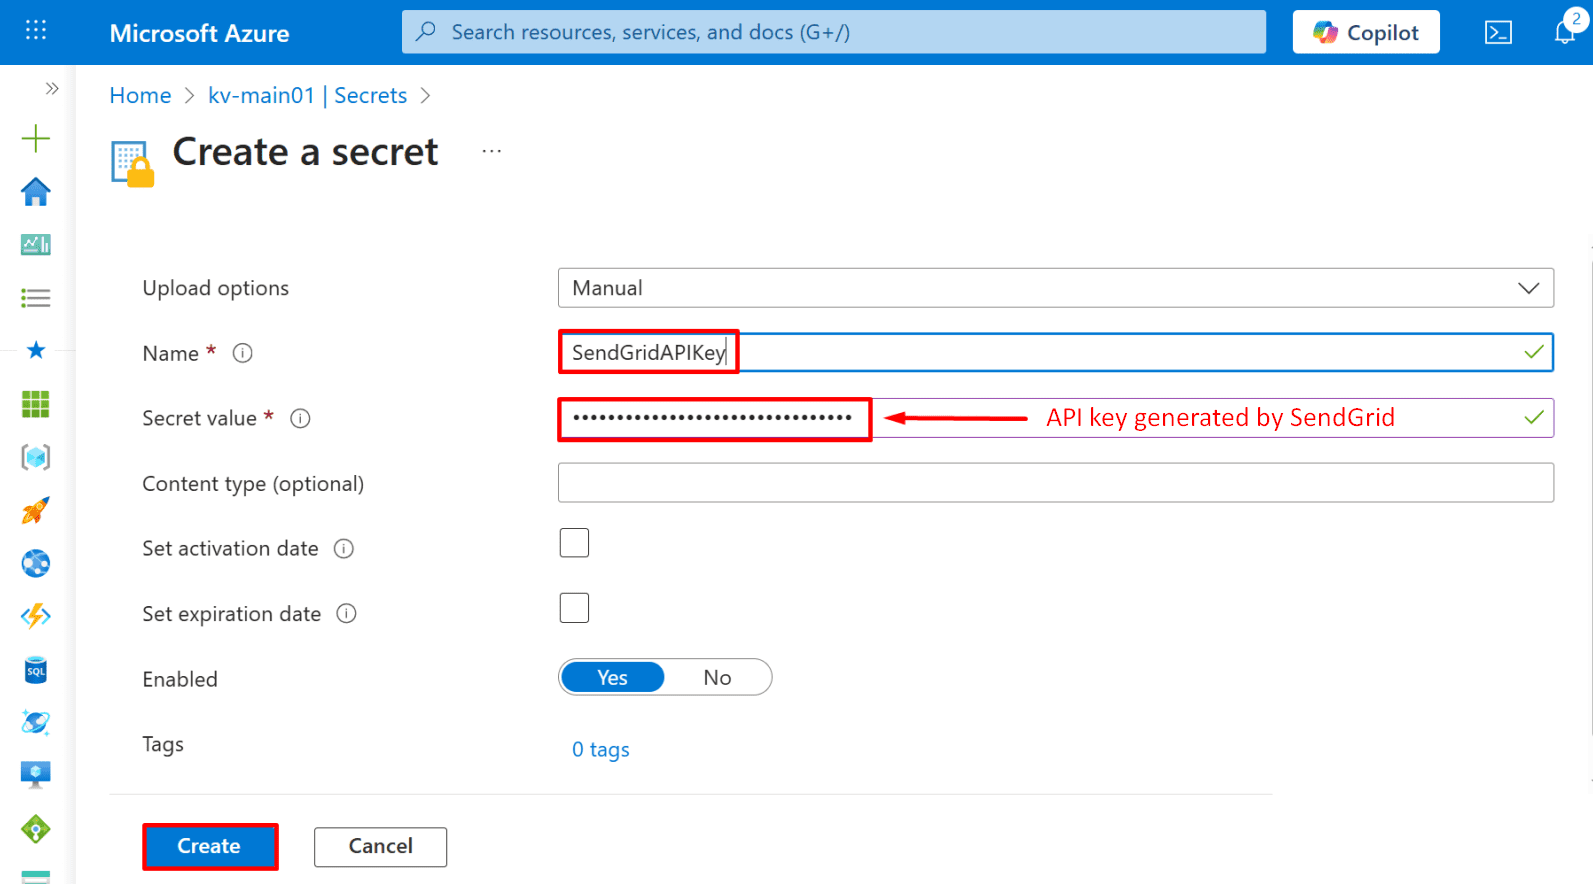
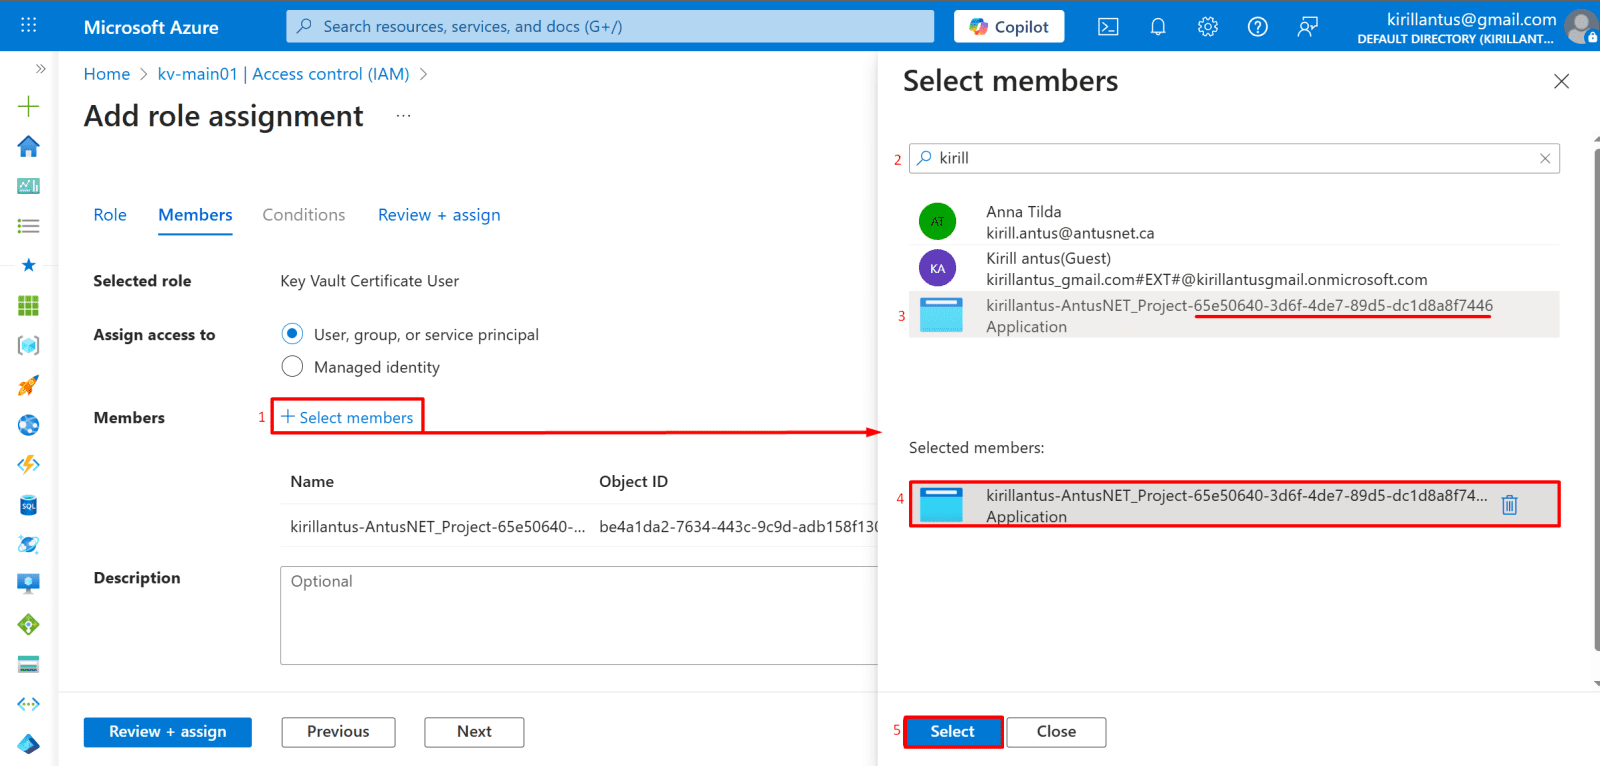
5. Securely send an external notification email via the SendGrid API and store the API key as a secret in Azure Key Vault.
6. Manage secrets using variable groups instead of the Azure Key Vault.
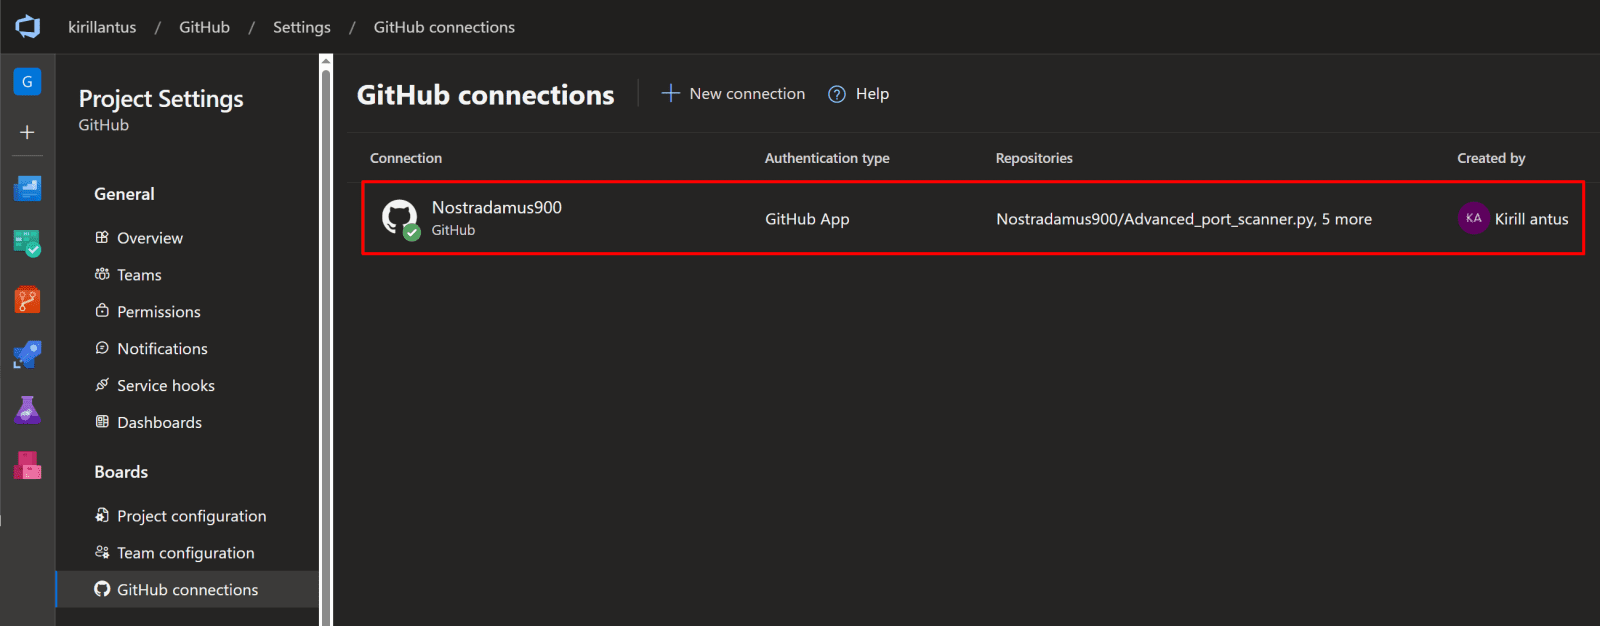
7. Bonus: Connect your GitHub account to Azure DevOps.
*
Steps
Create a new Agile project and generate a PAT if you plan to use a self-hosted agent.
The PAT is a vital security step that allows your self-hosted agent to securely connect and authenticate with your Azure DevOps environment.
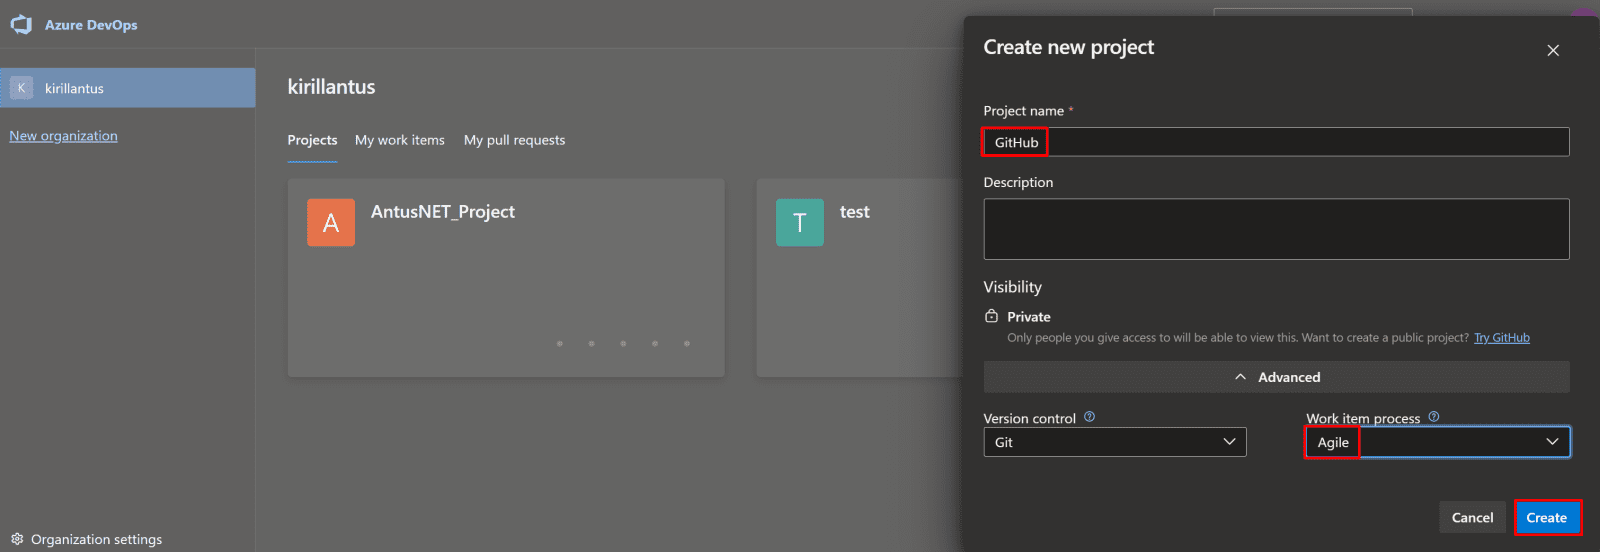
1. Create a new Agile project.
- Navigate to Azure DevOps.
- Click on “New Project”.
- Choose the Agile process template.
- Provide a project name and optional description.
- Click “Create” to initialize your new Agile project.

*
2. Create a Personal Access Token (PAT) for Authentication
- In Azure DevOps, click on your user profile in the top-right corner.
- Navigate to User settings → Personal access tokens

*
3. Click “New Token”

*
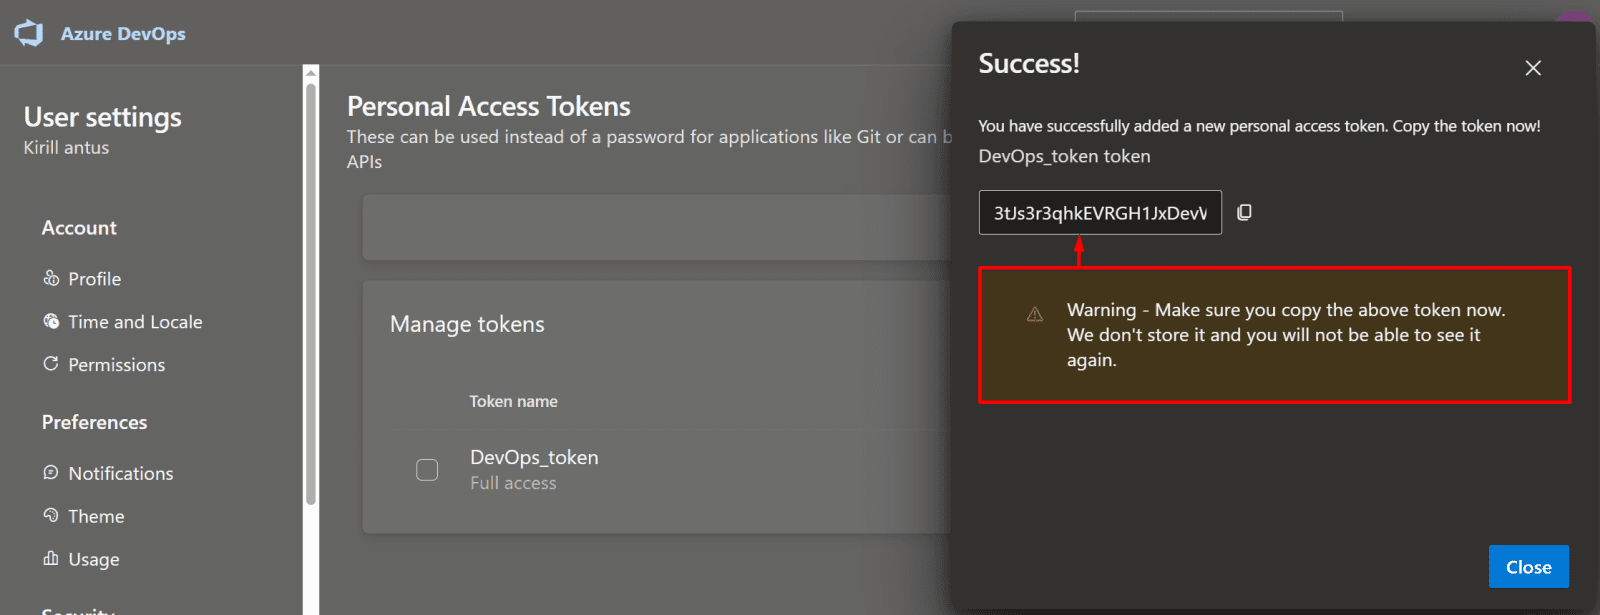
4. Give the token a name, select the appropriate organization, and set an expiration date.
- Choose the scopes/permissions required for your self-hosted agent or pipeline.
- Click “Create” and copy the token—you won’t be able to see it again.
- Use this token to authenticate your Windows system or agent with Azure DevOps
Note: For demonstration purposes, this demo will use full access permissions. In production environments, it is recommended to follow the principle of least privilege and grant only the necessary permissions.

*
5. Make sure to save the token value.

*
Create an agent pool, add a self-hosted agent, download the agent, and complete the connection to Azure DevOps.
This guide walks you through setting up a self-hosted agent by creating an agent pool, downloading the agent software, and quickly connecting your dedicated machine to Azure DevOps for flexible and powerful pipeline execution.
1. Navigate to Your Project in Azure DevOps.
- Open Azure DevOps in your browser.
- Select your organization from the list.
- Click on the project you want to work on to open its dashboard.

*
2. Open Project Settings.
- In your Azure DevOps project, scroll to the bottom-left corner of the page.
- Click on Project Settings to access configuration options for your project.

*
3. Choose Your Agent Pool
- To use your own machine, select the Default (Self-Hosted) Agent.
- If you want to use Microsoft-managed infrastructure, select Azure Pipelines, which provides a Microsoft-hosted agent.

*
4. Add a Self-Hosted Agent Pool
- Click “Add pool” to create a new agent pool.
- Under Pool type, select Self-hosted.
- Provide a name for your agent pool.
- Check “Grant access permissions to all pipelines” to allow all pipelines in the project to use this pool.
Note: An agent pool provides the machines (agents) that Azure DevOps pipelines use to run builds, tests, and deployments. Without a pool, your pipelines cannot execute.

*
5. Click on the self-hosted agent pool you just created to view its details and manage agents.

*
6. Add a New Agent.
- Click “New agent” within your self-hosted agent pool.
- Download the agent package for your operating system (e.g., Windows, Linux, macOS).

*
7. Initialize the Agent Connection.
- Unzip the downloaded agent and (optionally) rename the folder to devops-agent for simplicity.
- Open a terminal or PowerShell in the agent folder.
- Run the configuration script: config.cmd
When prompted, provide:
- Server URL – the URL of your Azure DevOps organization.
- Personal Access Token (PAT) – generated earlier.
- Agent pool – select the pool you created.
Accept the default settings for the remaining prompts, unless you have custom requirements.

*
8. Start the Self-Hosted Agent
- In the agent folder, run the following command to start the agent and listen for pipeline requests: run.cmd
The agent will now connect to Azure DevOps and be ready to execute jobs from your pipelines.

*
9. Ready to Run Pipelines.
- With your self-hosted agent running and connected, you are now ready to execute Azure DevOps pipelines.
- Pipelines will use your self-hosted agent to perform builds, tests, and deployments.