This guide shows how to use Visual Studio Code to deploy and manage Azure resources, set up disaster recovery to another region, test failover, and assign a public IP to the replicated VM.

Architecture diagram
Task Details
1. Prepare VS workspace for integration with Azure resources.
2. Connect to Azure from VS
3. Create Resource group and Virtual Machine from Visual Studio Code.
4. Configure disaster recovery to a different region.
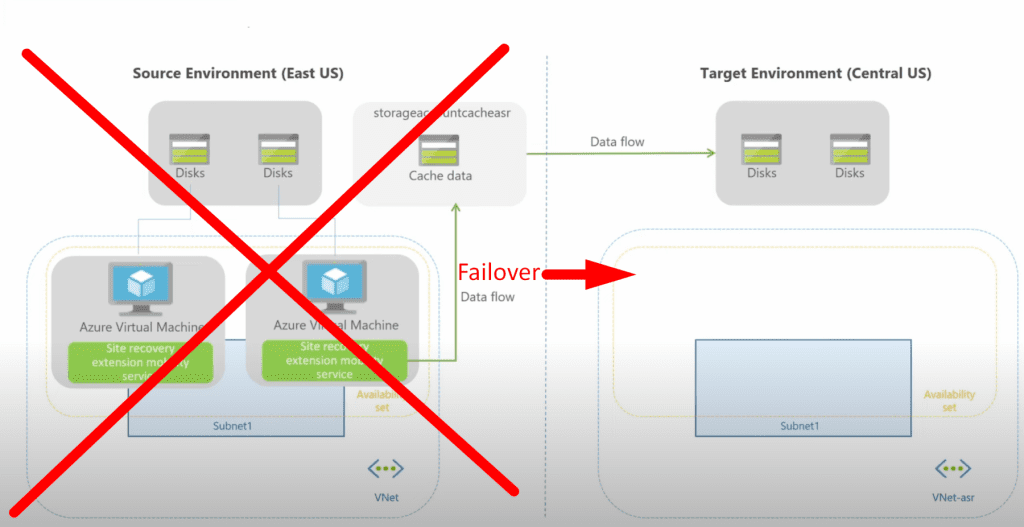
5. Test the failover.
6. Assign a public IP address to the replicated VM.
*
Steps
1. Prepare VS workspace for integration with Azure resources.
Install the Azure VS Code extensions:
- Azure Account
- Azure CLI Tools
- Azure Functions
- Azure App Service
- Azure Resource Manager (ARM) Tools
- (Optional) Azure Databricks, Azure Machine Learning, etc.
1. Install the Azure CLI tool on Visual Studio Code.
Note: Follow the same steps to install other extensions.

*
Create VS workspace.
1. Create a workspace in VS.
- Create a folder in any location named: azure-vm-deploy
- Click File ▸ Open Folder...
- Open the folder created earlier: azure-vm-deploy
- Open it in VS Code.
Note: This gives you a clean workspace to save your deployment files (scripts or templates).
*
2. Make sure Azure CLI is installed on your machine.
On Windows:
- Download and install the Azure CLI:
https://learn.microsoft.com/en-us/cli/azure/install-azure-cli-windows - Choose the MSI installer
- Follow the installer prompts
- After installation, restart VS Code (important!)
*
3. Open terminal and confirm installation:
az --version

*
Connect to Azure.
1. Connect to Azure via Visual Studio Code
Open the terminal in VS Code and run the following command to log in:
Use your Azure credentials to log in.


*
Create Resource group and Virtual Machine from Visual Studio Code.
Create Resource group.
1. Run the following commands in VS terminal to create resource group.
PS D:\Documents\Azure_CLI\azure-vm-deploy> $grp="ProductionRG"
PS D:\Documents\Azure_CLI\azure-vm-deploy> $location="eastus"
PS D:\Documents\Azure_CLI\azure-vm-deploy> $vmname="AppServerVM"
PS D:\Documents\Azure_CLI\azure-vm-deploy> # Create resource group
PS D:\Documents\Azure_CLI\azure-vm-deploy> az group create --name $grp --location

*
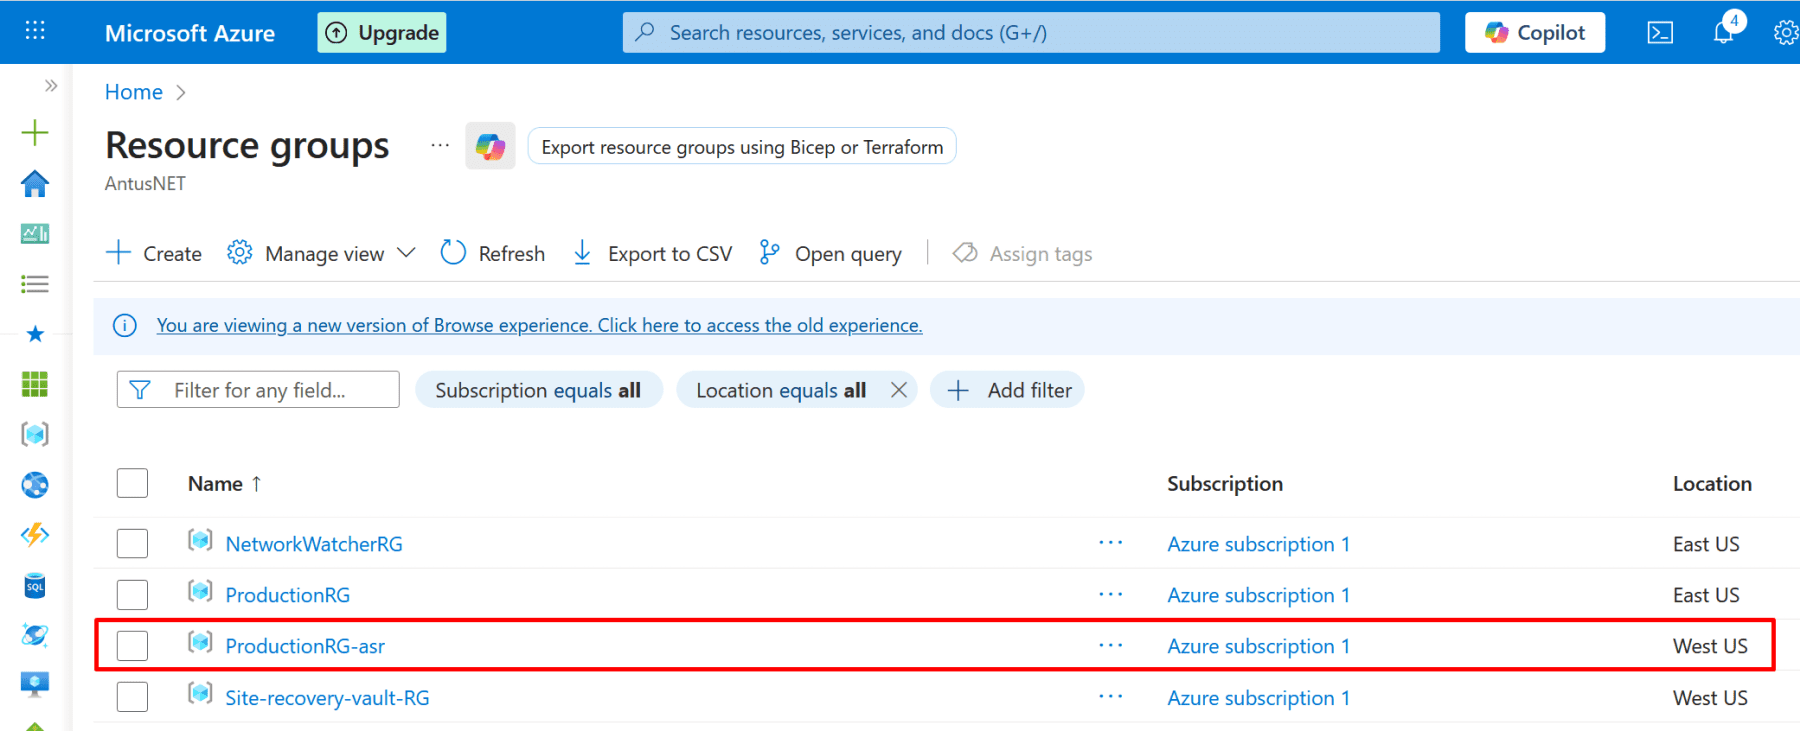
2. Confirm that the resource group is created in the Azure portal.

*
Create Virtual Machine.
1. Run the following commands in VS terminal to create a resource group.
Update the values to match your environment.
az vm create --resource-group ProductionRG --name VM01 --image win2022datacenter --size Standard_B2s --public-ip-sku Standard --admin-username admin01 --admin-password '@Password123' --storage-sku Standard_LRS

*
2. Confirm that the virtual machine and its accompanying resources have been created in the Azure portal.

*
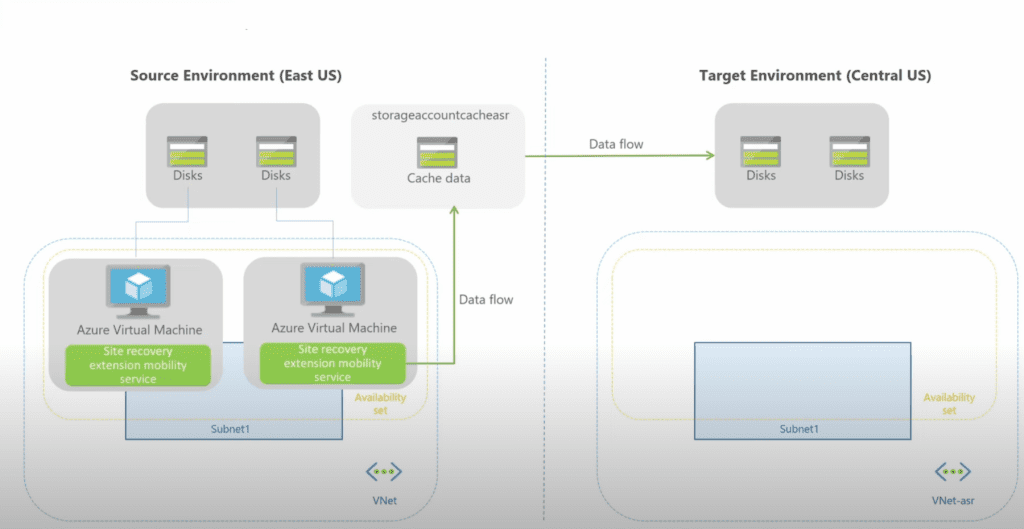
Configure disaster recovery to a different region.
1. Configure disaster recovery on VM.
- Go to VM → Disaster recovery → choose target region
- Click Next: Advanced settings

*
2. Configure Advanced Settings in Azure VM Disaster Recovery.
Target setting.
These define where the VM will be created in the secondary region.
When you configure a VM for replication in Azure Site Recovery (ASR), the Target Settings control what happens to the VM during failover - including compute, storage, networking, and identity.
Note: Basically, ASR will make the VM ready to start in the secondary region with minimal user input, but for production workloads, customizing these settings is recommended.
Note: In this demo I will use default target settings.

*
VM Storage settings.
These control where the VM disks are replicated.
1. Choose the desired settings.