Loading...

Azure Quick Links

Azure Cloud Projects

Securing Azure SQL Database

Secure a SQL database by enabling auditing, Microsoft Defender, vulnerability assessment, data classification, Dynamic Data Masking, and Always Encrypted using the SQL Server managed identity.

Task Details

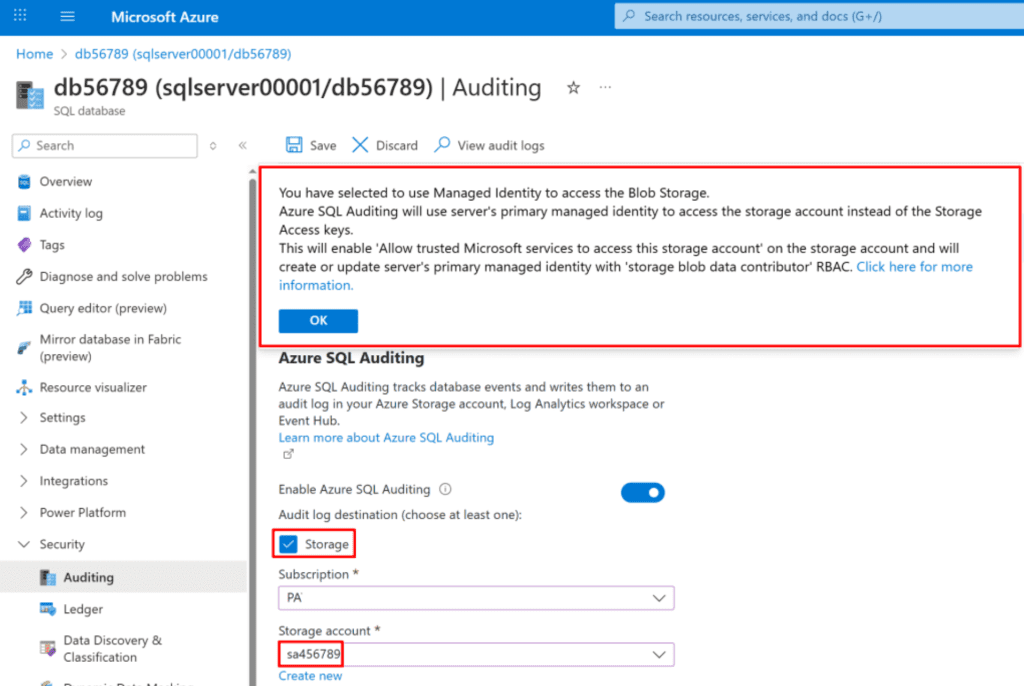
  • Create a database and enable Database Auditing to monitor and log database activities.
  • Enable Microsoft Defender for SQL and perform a Vulnerability Assessment to identify and remediate potential security risks.
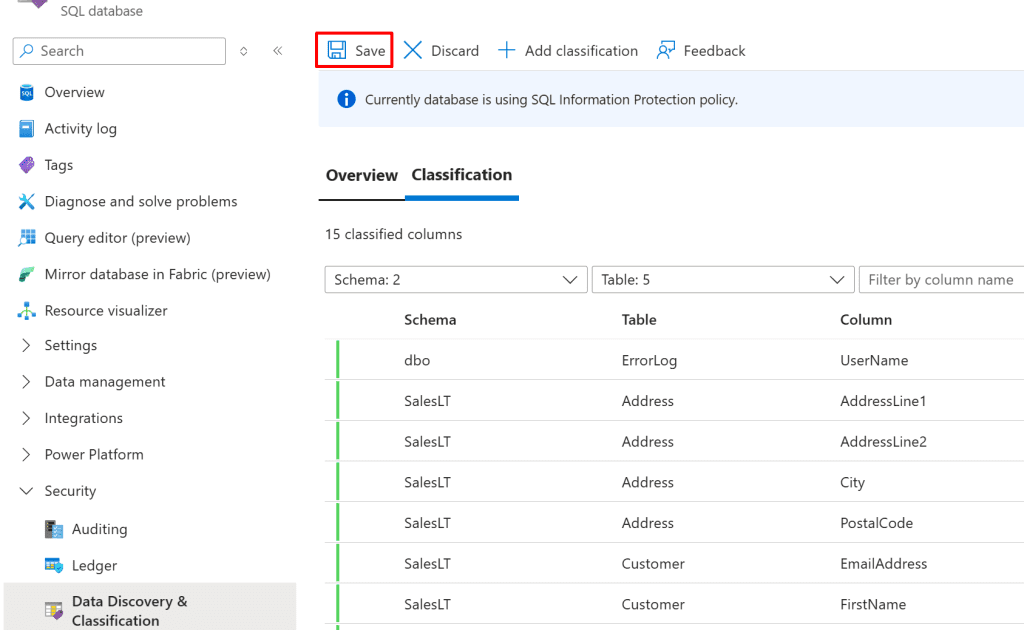
  • Manage Data Discovery & Classification recommendations in Microsoft Defender for SQL to classify and protect sensitive data.
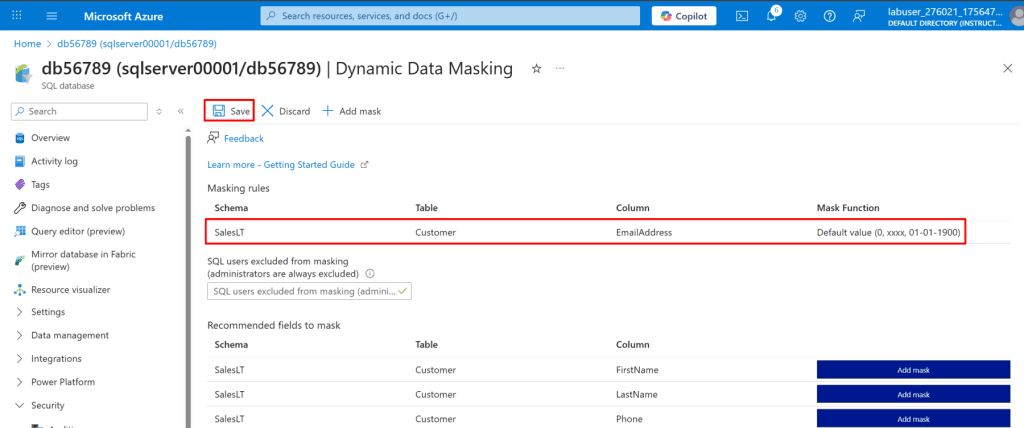
  • Configure Dynamic Data Masking to limit exposure of sensitive information to non-privileged users.
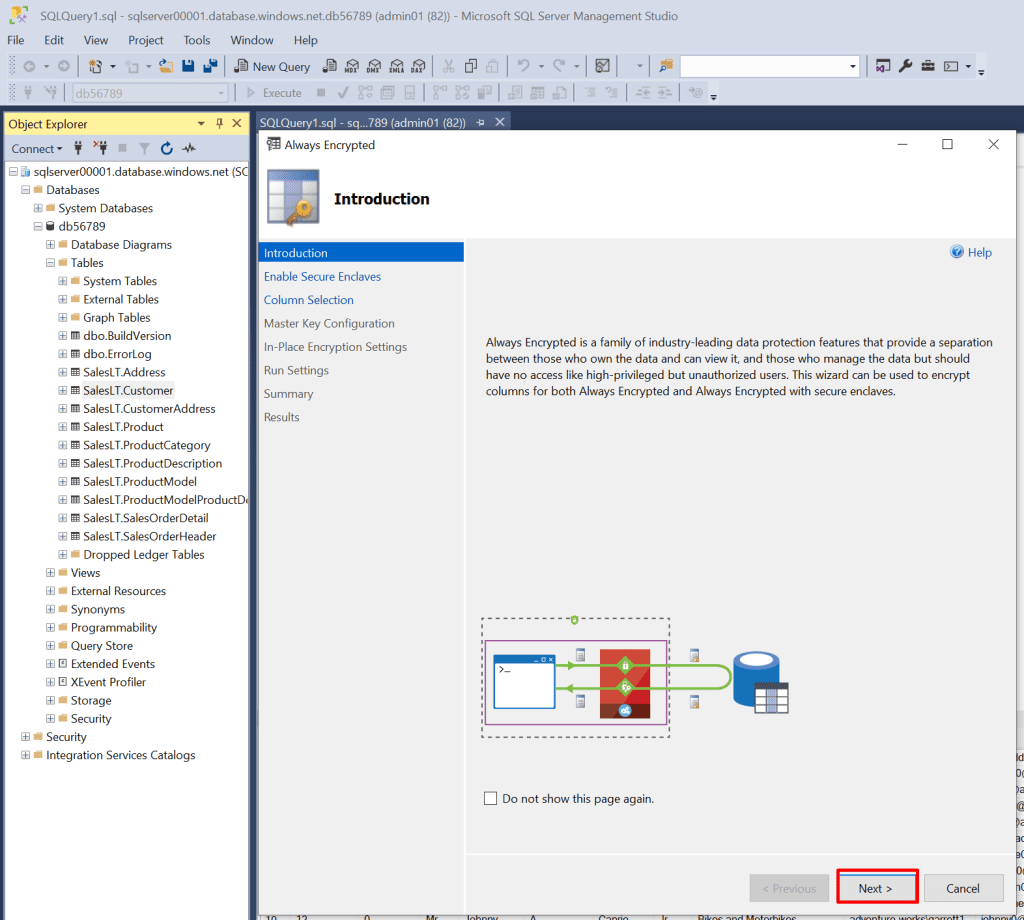
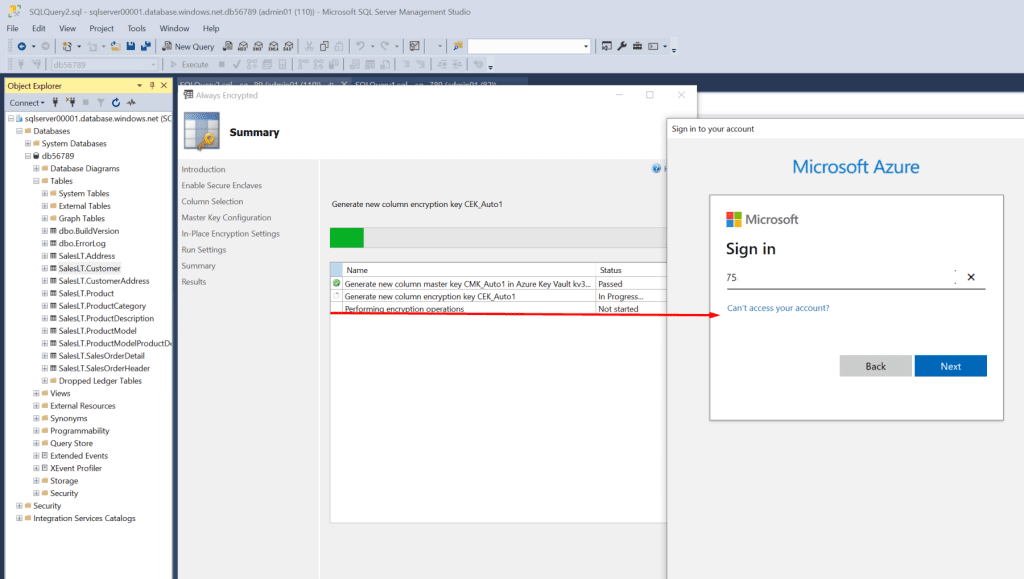
  • Enable Always Encrypted in Azure SQL using the sqlserver managed identity to ensure client-side encryption of critical columns.


Steps

Note: In this guide, we use Azure SQL PaaS. A SQL VM is preferable when full control, legacy support, or advanced features are required, while Azure SQL PaaS is ideal for modern applications needing a fully managed, secure, and scalable database solution.

Create an Azure SQL Database

1. In the Azure portal, create an Azure SQL Database on a new logical SQL server.

  • In the Azure Marketplace, search for and select SQL Database, and then select the SQL Database tile, and then click Create.

*

2. Use the values provided in the table, and keep the default settings for any properties not listed.

In the SQL Database blade, select Create.

*

On the Basics tab:

  • Resource group: your resource groupp
  • Database name: db56789
  • Server: Create new →
  • Name: sqlserver00001
  • Authentication: SQL authentication
  • Admin login: Admin01
  • Password: Password123

  • Workload environment: Development

  • Click on Compute + storage → Configure database →
  • Tier: Basic 2 GB → Apply

*

Networking tab:

  • Connectivity method: Public endpoint
  • Allow Azure services: Yes
  • Add current client IP: Yes

*

Security tab:

  • Microsoft Defender for SQL: Not now
  • Next: Additional settings

*

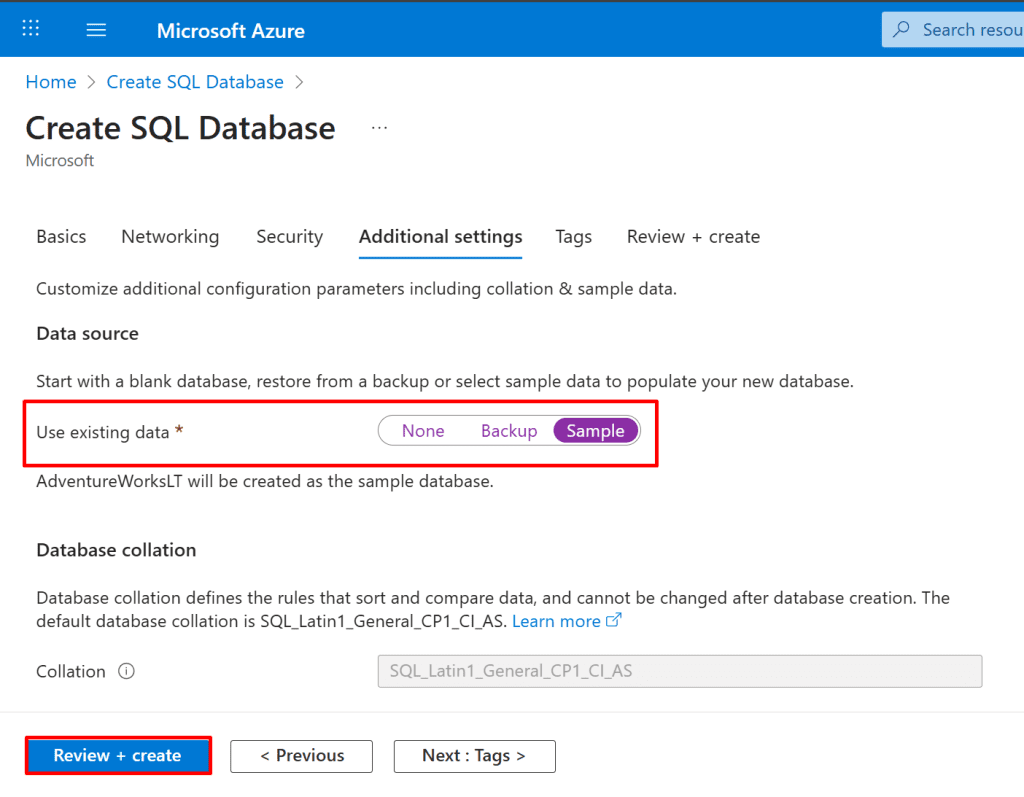
Additional settings tab:

  • Data source: Sample (AdventureWorksLT)
  • Select Review + create → verify → Create.

Note: In the Additional settings → Data source section, selecting Sample will create the AdventureWorksLT sample database. This option provides pre-populated tables and data for testing and demonstrations.

Note: The deployment takes about 3–5 minutes, and Azure SQL Database is a fully managed service with automatic patching, upgrades, and backups.

*

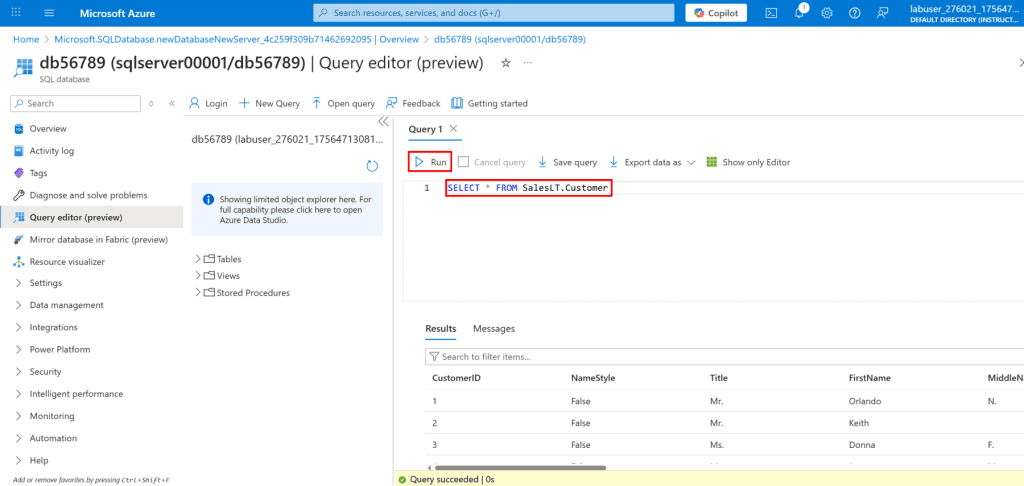
3. Log in to the Database database as Admin01 using Password123 as the password, and then create a query to retrieve all the rows in the SalesLT.Customer table by using SELECT.

  • On the Deployment blade, select Go to resource.

*

4. In the Database service menu, select Query editor (preview).

  • On the Query editor (preview) page: Login: Ensure Admin01 is entered.
  • Password: Enter Password123, then select OK.

*

5. In Query1, line 1, enter the following Transact-SQL (T-SQL) code:

Copy Code:  SELECT * FROM SalesLT.Customer

  • Select Run to execute Query1, and then review the results.
  • Close the Query editor page, and then if prompted by a Your unsaved edits will be discarded dialog, select OK.

Enable database auditing.

1. Enable SQL auditing on the db56789 database, and then store the audit log in in a new storage account named sa4567

  • On the Azure portal home page, under Navigate, select All resources.
  • In All resources, select the SQL database db56789.
  • In the db56789 service menu, under Security, select Auditing.

On the Auditing page:

  • Toggle Enable Azure SQL Auditing to On.
  • Under Audit log destination, select Storage.
  • For Subscription, choose your subscription.
  • For Storage account, select Create new.
  • Select Save from the command bar.

*

In the Create storage account blade:

  • Name: sa456789
  • Leave other values at default.
  • Select OK and wait for the storage account to be created.

*

Back on the Auditing page, select Save from the command bar.

  • In the Success dialog, select OK and Save.

*

Test database auditing.

1. Log in to the db56789 database as Admin01 using Password123 as the password.

  • On the All resources blade, select the db56789 SQL database.
  • On the db56789 service menu, select Query editor (preview).
  • On the Query editor page, in SQL server authentication, in Login, ensure that Admin01 is entered, in Password, enter Password123, and then select OK.

*

2. Create a database user named user1 in the database that has Password123 as the password by using CREATE USER, and then add the new user to the db_datareader database role by using ALTER ROLE.

In the Query editor page, in Query1, enter the following T-SQL statements:

Copy Code: CREATE USER user01 WITH PASSWORD = 'Password123';
                      ALTER ROLE db_datareader ADD MEMBER user01;

Select Run to execute Query1.
On the Messages page, verify that the message Query succeeded: Affected rows: 0 is returned.
Close the Query editor page, and then if prompted by a "Your unsaved edits will be discarded" dialog, select OK.

*

3. Log in to the db56789 database as user01 using Password123! as the password.

*

4. Create a query that selects all the data in the SalesLT.Customer table by using SELECT, and then run the query.

On the Query editor page, in Query1, enter the following SQL code:

Copy code: SELECT * FROM SalesLT.Customer;

Select Run to execute Query1, and then review the results.

*

5. As user01 attempts to delete all rows from the SalesLT.Customer table using the DELETE statement.

In Query1, replace any existing code with the following T-SQL:

Copy code: DELETE FROM SalesLT.Customer;

  • Select Run to execute the query and review the error message.

You should see the following error message because user1, as a member of the db_datareader role, does not have permission to delete data from the table.

"Failed to execute query. Error: The DELETE permission was denied on the object 'Customer', database 'db56789', schema 'SalesLT'."

Close the Query editor page. If prompted with “Your unsaved edits will be discarded”, select OK.

*

6. Review the database-level audit log for the db56789 database, and then review the audit of the failed delete statement.

  • On the db56789 service menu, in Security, select Auditing.
  • If prompted to discard changes, select OK.
  • On the Auditing page, on the command bar, select View audit logs.

  • On the Audit records page, in Audit source, ensure that Database audit is selected, and then select the most recent audit record that has an Action status of Failed.

  • On the Audit record page, ensure that the Principal name displays user01, and then ensure that the Status displays Failed.
  • On the Audit record page, in STATEMENT, review the failed delete statement.
  • This confirms that user01’s attempt to delete data failed, and the failed DELETE statement is captured in the audit log.

Enable Microsoft Defender for SQL and run a vulnerability assessment.

1. Enable Microsoft Defender for SQL for the db56789 database.

  • On the db56789 service menu, in Security, select Microsoft Defender for Cloud.
  • On the Microsoft Defender for Cloud page, in Microsoft Defender for SQL, select Enable.

Note: Enabling Microsoft Defender for SQL may take a few minutes to complete.

*

2. Perform a vulnerability assessment for the db56789 database.

  • On the db56789 Microsoft Defender for Cloud page, scroll down, and then in Vulnerability assessment findings, select View additional findings in Vulnerability Assessment.

*

3. On the Vulnerability Assessment page, on the command bar, select Scan.

The vulnerability assessment may take a few minutes. Select Refresh to update the status, or rerun the scan if no results appear.

*

4. Review the recommendations provided in the vulnerability assessment for the database.

Note: SQL Vulnerability Assessment is a feature of Microsoft Defender for SQL that helps you identify and remediate potential database vulnerabilities.

*

Manage security recommendations in Microsoft Defender for SQL.

1. In the Vulnerability Assessment, review the finding "The dbo user should not be used for normal service operations," and then approve the current scan result as the Baseline value.

  • On the Microsoft Defender for SQL Vulnerability Assessment page, under Findings, select ID VA1143 to open the finding.

*

2. On the Finding pane, review the details for the rule "The dbo user should not be used for normal service operations," and note the message: "There is no remediation script for this rule."

  • Select Add all results as Baseline and click "Yes"

*

3. Verify that the Status for the finding is now In Baseline then Close the Finding pane.

*

4. You can select the Add All Results as Baseline option to indicate that you accept the current settings. This finding will not appear in the list of vulnerabilities during the next scan unless the settings are changed.

  • Perform another scan, and then review the Vulnerability Assessment recommendations again.

Note: The finding "The dbo user should not be used for normal service operations" has been removed from the Findings tab. If there are no findings (Total Vulnerabilities = 0), the Passed list is displayed to show all the rules that were successfully passed.

*

5. Review the Data Discovery & Classification recommendations for the db56789 database, and then accept all the recommendations.

*

6. On the Classification page, select the Select all check box, and then select Accept selected recommendations.

*

7. On the Data Discovery & Classification page, on the command bar, select Save.

Note: Data Discovery & Classification allows you to identify and classify sensitive data columns in a database, as well as create custom labels and generate detailed reports.

Configure Dynamic data masking.

1. Configure Data Masking

  • Go to Resource -> Database.
  • In the Security menu, select Dynamic Data Masking.
  • Click Add mask in email column.

  • Set the schema, table, and column to be masked.
  • Set the masking field format (e.g., Email).
  • Click Add, then Save.

*

2. Log in as user01 and view the masked column.

*

3. Run this query as user01:

Copy code: SELECT * FROM SalesLT.Customer;

Note: Dynamic Data Masking only hides sensitive data from non-privileged users at query time and does not encrypt the data. Administrators or users with the UNMASK permission can still see the original values. To ensure that even database administrators cannot view sensitive data, use Always Encrypted, which provides true client-side encryption and protects data at rest and in transit.

Enable always encrypted.

1. Enable System assigned managed identity on sqlserver00001.

  • Navigate to the SQL server in the Azure portal.
  • In the left-hand menu, under the Security section, select Identity.
  • Under System assigned managed identity, switch the Status to On.
  • Click Save at the top of the page to apply the changes.

Note: Always Encrypted requires the client application to retrieve encryption keys from Azure Key Vault. The SQL Server engine never accesses the keys and only ever sees encrypted (cipher) data. Enabling a Managed Identity or registering the client application in Azure AD provides it with a secure identity to authenticate to Key Vault without using passwords or secrets. Without this, the client application cannot access the encryption keys and Always Encrypted will not work.

*

2. Create a Key Vault and assign the Key Vault Crypto User role to the sqlserver00001 managed identity so that the Always Encrypted mechanism can access the Key Vault.

  • In the Azure portal's search bar, type "Key vaults".
  • From the search results, select Key vaults.
  • On the Key vaults page, click the + Create button.
  • Fill in the required details to create your new Key Vault.

*

3. Fill up following details.

Project Details:

  • Select your Subscription from the dropdown menu.
  • Choose an existing Resource group or click "Create new" to make a new one.

Instance Details:

  • Select the Region where you want to deploy the Key Vault.
  • Choose a Pricing tier (Standard or Premium).

Click "Next" to proceed to the next configuration section.

*

4. Assign the Key Vault Crypto User role to the sqlserver00001 managed identity so that the Always Encrypted mechanism can access the Key Vault.

  • In the Key Vault's menu, select Access control (IAM).
  • Click on the Add dropdown menu.
  • From the dropdown, select Add role assignment.
  • Proceed to the next screen to choose the role and the user or group you want to grant access to.

  • Select the Role: Choose the appropriate role from the list, such as Key Vault Crypto User, based on the permissions you want to grant.
  • Select the Managed Identity: In the "Members" tab, search for and select the specific managed identity you want to assign the role to. In this case, SQL server.
  • Click Select to confirm your choice.

Note: Make sure you assign the Key Vault Crypto User role to the Azure user account as well. This permission is required for the user to configure Always Encrypted in SQL Server Management Studio (SSMS) and interact with keys stored in Azure Key Vault.

*

5. Log in to sqlserver00001 using Microsoft SQL Server Management Studio to enable Always Encrypted.

  • On the left, select Overview.
  • Copy the Server Name.

*

6. In the Connect to Server window, enter the following details:

  • Server type: Select "Database Engine."
  • Server name: Enter the full server name. The image shows sqlserver00001.database.windows.net.
  • Authentication: Choose "SQL Server Authentication."
  • Login: Enter your login name, which is admin01 in the example.
  • Password: Enter your password.
  • Click the Connect button at the bottom of the window to establish the connection.

Note: Download Microsoft SQL Server Management Studio from here: https://sqlserverbuilds.blogspot.com/2018/01/sql-server-management-studio-ssms.html

*

7. View top 1000 rows.

  • Expand the specific database you want to access, which is db56789 in this example.
  • Expand the Tables folder within the database.
  • Locate the table you wish to view, such as SalesLT.Customer.
  • Right-click on the table name and select Select Top 1000 Rows from the context menu.

Note: This action will open a new query window and execute a SELECT statement, displaying the first 1000 rows from the selected table.

*

8. Encrypt the column using the Always Encrypted feature with Azure Key Vault.

  • In Object Explorer on the left, navigate to and expand the table you wish to modify. The image shows the table SalesLT.Customer is selected.
  • Right-click on the table name to open the context menu.
  • From the menu, hover over Encrypt Columns... to access the encryption wizard.

Note: This action will launch a wizard that guides you through the process of setting up Always Encrypted for the selected columns.

9. Click next.

*

10. Sign in with your Azure user that has the appropriate permissions to configure Always Encrypted (e.g., Key Vault Crypto User).

*

11. Check the box next to each column you want to encrypt, such as FirstName, MiddleName, and LastName.

  • Select the Encryption Type (e.g., Deterministic) and an Encryption Key for each selected column.
  • Click Next to continue the process.

*

12. Select Auto-generate column master key.

  • Choose Azure Key Vault as the key store provider.
  • Select your Azure Subscription and Key Vault (e.g., "kv34567").
  • Click Next.

Note: SQL Server Management Studio (SSMS) will automatically detect the Azure Key Vault once the proper permissions and configurations are in place.

*

13. Click Next three times.

*

14. Login once again as your Azure user.

*

15. The Always Encrypted operation may take some time to complete, depending on the size of the database and the number of columns or rows being encrypted.

*

16. Encryption completed successfully, and three columns have been encrypted.

*

Conclusion:
By completing these steps, you have established a robust security baseline for your Azure SQL Database. You have implemented auditing to track database activities, leveraged Microsoft Defender for SQL to identify and remediate vulnerabilities, applied Data Discovery & Classification to protect sensitive information, configured Dynamic Data Masking to limit data exposure, enabled Always Encrypted to ensure client-side encryption of critical columns, and relied on Transparent Data Encryption (TDE), which is enabled by default, to protect data at rest. Additionally, you can further strengthen security by using Network Security Groups (NSGs) to restrict access to the database, private endpoints to limit exposure to the public internet, and role-based access control (RBAC) to manage user permissions effectively. Together, these measures significantly enhance the security, compliance, and data protection posture of your database environment.

*

Written by Kirill.A - Azure & Cybersecurity Consultant at AntusNet

➤ Want more? Browse all our Azure implementation guides.

Need help implementing secure Azure solutions?

Contact us for a free consultation.

    error: Content is protected !!