Loading...

Azure Quick Links

Azure Cloud Projects

Provision a Storage Account with Terraform

Provision a Storage Account with Terraform

Task Details

  1. Create a Terraform template in Visual Studio Code to provision an Azure Storage Account.
  2. Install the Terraform CLI on your local machine.
  3. Upload and deploy the Terraform template using the Bash CLI to create the Storage Account in Azure.
  4. Bonus: Use the Azure Storage Account module from the Terraform Registry to create a storage account.

*

Steps

1. Launch Visual Studio Code on your computer.

  • Create a new file by selecting File → New File from the menu.

Note: Download Visual Studio Code from here: https://code.visualstudio.com/Download

*

2. Name the file main.tf and press Enter. This file will serve as the primary Terraform configuration where we define our infrastructure setup.

*

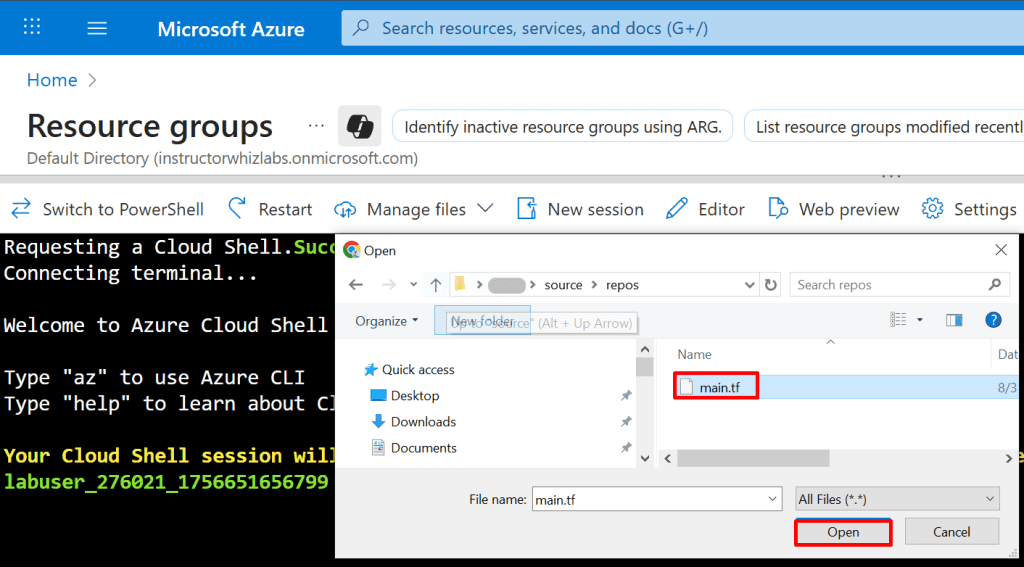
3. Save the main.tf file to your computer.

*

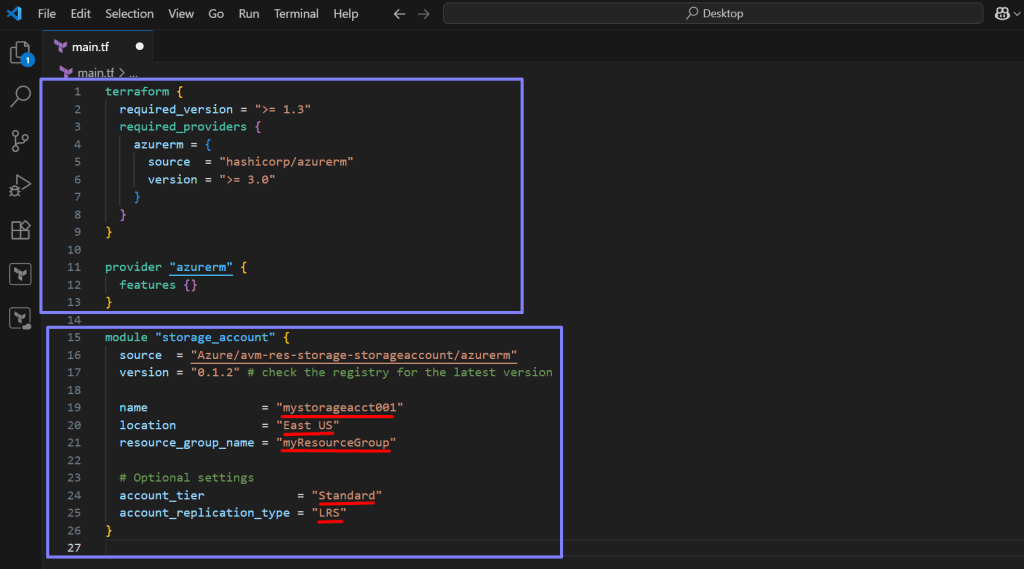
4. Let’s define the Terraform configuration. In the main.tf file, specify the Azure provider and the required version as shown below:

Copy Code

Note: If your Terraform code appears in plain white text, you need to install the Terraform extension in Visual Studio Code.

*

5. Look in the bottom-right corner of VS Code, it should say “Terraform.”

  • If it says Plain Text or something else:
  • Click it.

*

6. Select Terraform from the list. If it is not available, download the Windows (x64) version from the following link: https://developer.hashicorp.com/terraform/install?utm_source=chatgpt.com

*

Install Terraform CLI

1. You need the Terraform command-line tool first:

  • Go to Terraform Downloads.(above link)
  • Unzip it to a folder, e.g., C:\Terraform. (make sure the terraform.exe in folder named Terraform)
  • Add the folder to your PATH environment variable:
  • Search Environment Variables → Edit → Path → Add C:\Terraform.

*

2. Click on Environment Variables… to open the system environment settings.

*

3. Click on “Path” and add the folder location of terraform.exe (in this case, C:\Terraform)

*

4. Click “New,” enter C:\Terraform, and then click “OK.”

*

5. Open a new PowerShell/Command Prompt and run:

Copy Command: terraform -v

You should see the Terraform version printed.

*

Install the Terraform VS Code extension and create a Terraform template to provision a Storage Account.

1. Open VS Code.

  • Press Ctrl+Shift+X (or click Extensions icon).
  • Search for “HashiCorp Terraform”.
  • Click Install.

Note: This gives you syntax highlighting, IntelliSense, and snippets for .tf files.

*

2. Reference an Existing Resource Group. Replace <resource-group-name> with the name of your resource group, which can be found in your Azure credentials section.

Copy Code

3. Define the Storage Account resource and update it with your desired name.

Copy Code

Your complete main.tf file should look like this: 

*

4. Open the Azure Portal and click the Cloud Shell icon in the top-right corner. Then, select Bash.

*

5. Keep the default settings, select your subscription, and then click Apply.

*

6. In the Cloud Shell toolbar, click Manage Files, choose Upload from the dropdown, and upload the recently created main.tf file.

*

7. Run the ls command to verify that the file was uploaded successfully.

*

8. Execute the following command to initialize Terraform. This will download the Azure provider and set up your working directory.

Copy Command: terraform init

*

9. Apply the Terraform configuration to provision the resources. Terraform will display an execution plan and prompt you to confirm before proceeding.

Copy Command: terraform apply

*

10. When prompted, enter "yes" to confirm and proceed with the deployment.

*

11. Verify that the Storage Account has been created by navigating to your Resource Group in the Azure Portal. On the Overview page, under the Resources section, you should see the newly created Storage Account.

Note: You can get more terraform templates from here: https://registry.terraform.io/browse/modules?provider=azurerm%2Cazure

*

Bonus: Use the Azure Storage Account module from the Terraform Registry to create a storage account.

Step 1: Go to the Terraform Registry.

Step 2: In the search bar, type avm-res-storage-storageaccount.

Step 3: Select the module from the results to view its details and variables.

*

Step 4: Copy the example code below into your main.tf file.

Copy code

*

Code explanation.

Top Part – Terraform & Provider Setup

  • This is the foundation of every Terraform project.
  • It usually stays the same across all deployments.

It only changes if:

  • You use a different provider (e.g., AWS, GCP instead of Azure).
  • You want to update Terraform or provider versions.

Note: Think of it as “setting up the engine”.

*

Module Part – Storage Account Deployment.

  • This is where you insert specific modules for the resource you want (e.g., storage account, VM, Key Vault, VNet).
  • Each module comes with its own required/optional variables.
  • You can add multiple modules inside the same main.tf file to build a whole environment.

Note: Think of it as “plugging in different tools into the engine.”

Note: Don't forget to change to your resource group.

*

5. Perform steps 4 to 10 from the previous section to deploy the .tf file in Azure.

Upload your main.tf file and execute the following commands in the Azure Bash shell.

Copy commands:

terraform init
terraform plan
terraform apply

Note: If you encounter this error during deployment:

Wait for the module maintainer to release a version that supports "https_traffic_only_enabled".

Ignore the warning temporarily, it won’t break deployment, but you should fix it before upgrading the provider to v4+.

*

6. Combine a few modules.

Copy code

*

Conclusion:
By following these steps, you have successfully created a Terraform template in Visual Studio Code, installed the Terraform CLI on your local machine, and deployed the template using the Bash CLI to provision an Azure Storage Account. This process demonstrates how Terraform enables infrastructure as code, providing a repeatable and automated way to manage Azure resources efficiently and securely.

*

Written by Kirill.A - Azure & Cybersecurity Consultant at AntusNet

➤ Want more? Browse all our Azure implementation guides.

Need help implementing secure Azure solutions?

Contact us for a free consultation.

    error: Content is protected !!